
C-section Scar Desensitization

Scar care should begin with desensitization.
Your birth provider cuts through SEVEN layers during a cesarean section, this is a major abdominal surgery. Many sensory nerves can become traumatized during this procedure making the scar and surrounding skin sensitive to various textures, clothing, and touch. Don’t worry our bodies are so resilient and the cool things about nerves is that they regenerate.
If you are noticing sensitivity at the scar or it is hard to touch your scar or wear certain clothing we recommend first seeing your birth provider to make sure healing is progressing well and that there is no infection. If cleared by your birth provider, scar care can begin with desensitization.
Please note that this scar guide reads in chronological order but our bodies can hold so much trauma. Some individuals may never need all parts of this guide, and some individuals may spend a lot of time at certain points. In general if you have pain, discomfort or touching your scar is triggering; we highly recommend working with a Pelvic PT in your area to create a specific plan for you.
1. Indirect Desensitization
This can start as early as 2 weeks postpartum. We recommend focusing on belly breathing. By expanding the belly with breathing we can provide indirect movement of the scar and activation of the muscles to help those scar fibers realign.

2. Abdominal “I Love You” Massage
In general, this type of desensitization is recommended to start after week 4 postpartum (as long as healing is progressing well). Massaging the abdomen will indirectly create some gentle pull on the scar to help scar fibers realign.
The “I Love You” massage is also designed to help promote intrinsic contractions known as peristalsis, which will get stool moving in the right direction. Reducing constipation and bloating during this period is important.
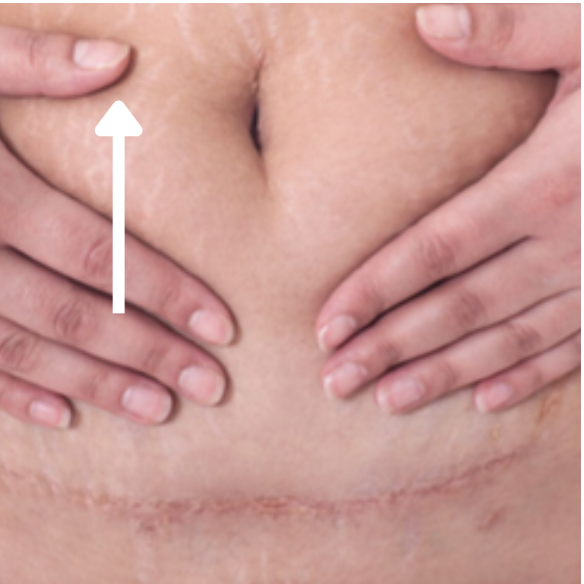
How to Perform “I Love You” Massage:
I: Lie down on your back. Starting on the right side of your belly, apply gentle pressure as you move your hand up in a straight line (like the letter "I")
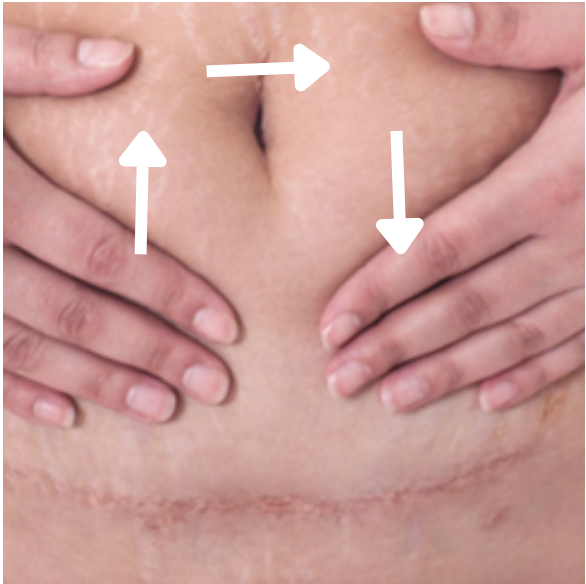
L: Starting from just beneath the right rib cage, apply gentle pressure as you move down to the top of your left hip bone. Repeat ten times.
U: Go back to the right hip bone and work up towards the rib cage, across the abdomen and down to the left hip bone forming the U. Repeat ten times.

3. Textures
Introducing textures directly to the scar is important to get the healing tissue used to various fibers and reducing pain and sensitivity.
Scar pads are a great way to apply pressure to the scar without having to physically touch it. This can be a great place to start. We recommend using scar pads at night.
Pick 3-4 textures starting from soft to firm and rub the textures directly over your scar. Start with a texture that is not painful
If you are having any pain with the desensitization part of scar care we recommend scheduling an appointment with a Pelvic PT. We offer virtual and in person appointments.